
Altered Photo Fun

A group of friends got together yesterday and altered photographs. Among the materials we used were sandpaper (to scratch the emulsion surface), watercolor and acrylic paints, glitter glue, magazine images and foil.

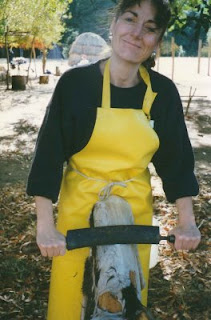
Above is an example of the original photograph I used and what it looks like after being altered.

There are no rules. Start with pictures that you're ready to toss, don't like or don't know what to do with. Then soak the photo in a tray of water for about 10 seconds, scratch the image surface with sandpaper, a coin or other rough material (while photo is still wet), add paint, glue collage materials to the surface, paint some more, and add anything else that suits your fancy.

An altered photo will never come out the way you expect. They're intended to be a spontaneous creation and don't have to make sense. Just make it fun. These can make great cards!

Comments

Popular posts from this blog

Highjacked Blog Photo

My profile photo was highjacked ! For those of you who are blogging, be wary. There are some unscrupulous folks out there who may be using or about to use a photo(s) you've uploaded to an online photo-hosting site. At the time I created a blog, having a URL for a photo uploaded online was the only way to insert a photo in your profile or to create a custom header. There had been no problems for a long while. This morning, however, I did a Google image search for my name and found my photo linked to a totally different blog than my own! It is possible I didn't mark my file with the online photo-hosting site as private, but I didn't expect this to happen. I don't know whether marking it private would have actually averted the situation, but I'm not waiting to find out. I eliminated my membership to that online photo-hosting service today and caution anyone to be careful with uploading images to the internet . If you read the terms of agreement at many sites, you'...

Life Book 15 - Week 36 Project Completed (or nearly completed)

This project went in an entirely different direction than the Life Book 2015 lesson.  That's ok because we're also working on accepting those times when we move in our own direction using the lesson purely as a launching point. This piece involved experimenting with collage on a substrate (muslin covered with joint compound), followed with paint, more collage, and then the felt, fabric and beaded plant. This piece was created through a class offered by Tamara Laporte from Willing Arts Ltd. For more information, visit this link:  www.willowing.org .

Pottery Play Day

Today, I threw a couple of bowls, but my ability to center was not working.  It could have been partly due to the new-to-me clay I tried using.  In addition, I trimmed three others.  One of those three ended up being very experimental...in that I tried a version of mishima on the interior of the bowl.  Mishima is a technique of painting a leather-hard vessel with an underglaze(s), then waxing the layer, and finally...carving a design in the underglaze/wax surface before the vessel is fired into bisque. I tried it, and we'll see how it comes out.    Below are the five vessels of Batch #8 that I brought home today.  Of them, there are two new things I tried.  The stripy one was done with one base layer plus a second layer of alternating painted stripes of the base color and mulberry.  The other first is where I used a base layer and added two different lip colors of different widths. Lately, I've noticed other potters getting some great results...