
Italic Calligraphy Class with Sara Loesch Frank

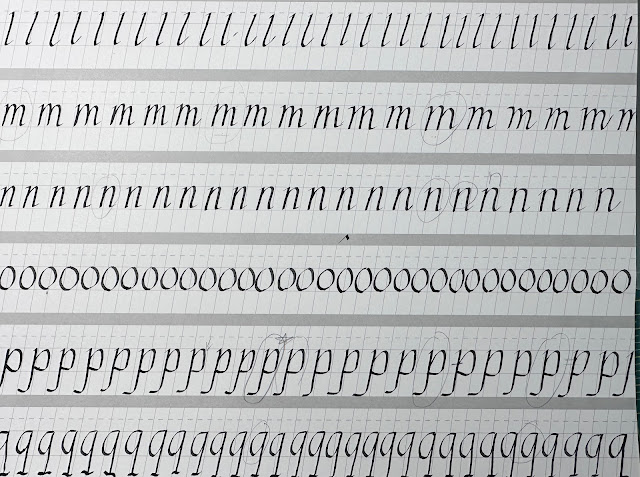
It's Week #3 of class where my classmates and I are learning the 'Italic' style.  It is like learning cursive and takes practice, practice, practice.  Just look at the variation between the letters in the practice sheet below.  They may look the same, but they're not.  Those that have been circled are considered good.

All the lettering is being done with a dip pen (and small calligraphy nib) plus ink.  So far with 15 practice pages under my belt, there is still so much more to learn and practice including the majiscules (aka the style's capital letters), numbers, and proper spacing when using the letters to create words.  

The practice is a kind of meditation -- in that there is repetition with concentration/noticing, and I'm enjoying it (the class too).  I'm also awed by the skill and knowledge of our instructor and feel fortunate to be studying with Sara!    


Comments

Popular posts from this blog

Highjacked Blog Photo

My profile photo was highjacked ! For those of you who are blogging, be wary. There are some unscrupulous folks out there who may be using or about to use a photo(s) you've uploaded to an online photo-hosting site. At the time I created a blog, having a URL for a photo uploaded online was the only way to insert a photo in your profile or to create a custom header. There had been no problems for a long while. This morning, however, I did a Google image search for my name and found my photo linked to a totally different blog than my own! It is possible I didn't mark my file with the online photo-hosting site as private, but I didn't expect this to happen. I don't know whether marking it private would have actually averted the situation, but I'm not waiting to find out. I eliminated my membership to that online photo-hosting service today and caution anyone to be careful with uploading images to the internet . If you read the terms of agreement at many sites, you'...

Life Book 15 - Week 36 Project Completed (or nearly completed)

This project went in an entirely different direction than the Life Book 2015 lesson.  That's ok because we're also working on accepting those times when we move in our own direction using the lesson purely as a launching point. This piece involved experimenting with collage on a substrate (muslin covered with joint compound), followed with paint, more collage, and then the felt, fabric and beaded plant. This piece was created through a class offered by Tamara Laporte from Willing Arts Ltd. For more information, visit this link:  www.willowing.org .

Pottery Play Day

Today, I threw a couple of bowls, but my ability to center was not working.  It could have been partly due to the new-to-me clay I tried using.  In addition, I trimmed three others.  One of those three ended up being very experimental...in that I tried a version of mishima on the interior of the bowl.  Mishima is a technique of painting a leather-hard vessel with an underglaze(s), then waxing the layer, and finally...carving a design in the underglaze/wax surface before the vessel is fired into bisque. I tried it, and we'll see how it comes out.    Below are the five vessels of Batch #8 that I brought home today.  Of them, there are two new things I tried.  The stripy one was done with one base layer plus a second layer of alternating painted stripes of the base color and mulberry.  The other first is where I used a base layer and added two different lip colors of different widths. Lately, I've noticed other potters getting some great results...